
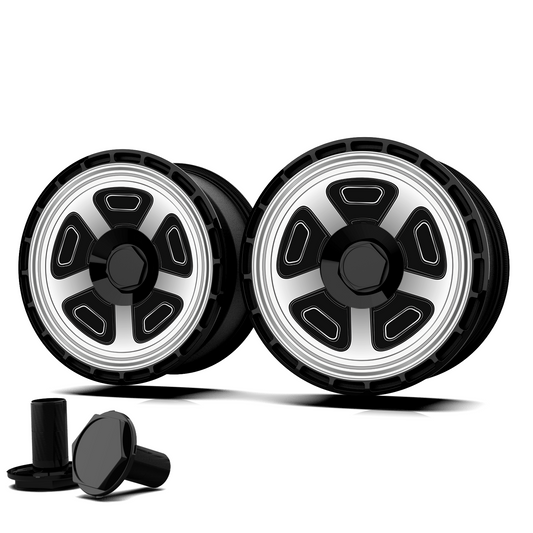
Fresh from a tight parking garage or an unforgiving curb, a gouged Tesla wheel cover is one of those small defeats every owner eventually meets. The good news: Tesla wheel cover scratch repair is usually a 30-minute driveway job, not a workshop bill. Before you rush to order replacements, it pays to know which scratches you can fix yourself and which ones are honestly beyond saving.
When Is a Tesla Wheel Cover Scratch Repair Worth It?
Start with the fingernail test. Run a fingernail gently across the mark — if it glides over without catching, you are dealing with a surface scuff in the painted finish, and a DIY fix will almost certainly work. If your nail catches in a groove, the scratch has cut deeper into the ABS plastic, and your options narrow.
Most Tesla wheel covers are made from tough ABS, which is forgiving material to work with. Use this quick damage scale to decide your next move:
- Light scuffs and swirl marks: finish-level only, no material removed. Polish and go — full repair possible.
- Moderate scratches: visible white or gray lines where the finish was displaced. Touch-up paint or plastic filler needed.
- Deep gouges, cracks, or warped edges: structural damage. The cover may still clip on, but it will look tired and can loosen over bumps — replacement is the smarter spend.
Also check the back of the cover and its retention clips. A scratch on the face is cosmetic; a cracked clip is a safety issue, because that is the same failure mode behind covers that work loose mid-drive.
What You Need for a DIY Scratch Repair
Nothing here is exotic — most of it lives in a standard detailing kit:
- Mild car shampoo and two microfiber towels
- Plastic polish or scratch-remover compound labeled safe for ABS trim
- Optional: 1500–2000 grit wet sandpaper for stepped-down edges
- Touch-up paint or a paint pen matched to your cover finish (matte black, gloss black, silver)
- Plastic trim restorer for final conditioning
Avoid household abrasives such as toothpaste or magic erasers on gloss covers — they cut unevenly and leave a hazy patch that is more noticeable than the scratch you started with.
How to Fix Light Scratches on a Tesla Wheel Cover
Once the fingernail test confirms surface-level damage, work through these steps in order. Total time is around 30–40 minutes for one cover, including drying.
- Step 1 — Remove and wash. Pop the cover off and lay it flat on a towel. Wash with shampoo and water, then dry fully so grit cannot drag under your polish.
- Step 2 — Level the area. For edges that catch a nail, lightly wet-sand in straight lines with 2000 grit, feathering just the scratch itself, not the whole face.
- Step 3 — Polish. Apply plastic polish with a microfiber applicator in small circles, adding pressure over the scratch. Wipe and inspect — most scuffs vanish at this stage.
- Step 4 — Touch up color. If a pale line remains, fill it with a matching paint pen in thin layers, letting each one dry before the next. Two thin coats beat one thick coat.
- Step 5 — Seal and reinstall. Finish with trim restorer, let it cure, then clip the cover back on until every retention tab clicks home.
Work on one wheel at a time so your reference stays consistent — polish and paint can shift color slightly, and you want all four covers to match under the same light.
Repair or Replace? The Honest Cost Math
A touch-up pen costs about the same as two coffees, so for a single light scuff, repair wins every time. The math changes when damage spreads: once two or more covers need repainting, a full Tesla wheel cover scratch repair stops being the cheap option, and a visibly patched set can look worse than a uniform set of new ones.
As a rule of thumb, replace when several covers are deeply gouged, when a clip is cracked, or when the finish has chalked from years of sun and brush washes. A fresh aftermarket set also resets your curb-rash protection — and if you are replacing anyway, it is the natural moment to try something bolder, like DIY custom wheel covers with your own artwork and colorway.
How to Prevent Scratches in the First Place
Most cover damage happens at under 5 mph, so prevention is mostly parking discipline: use your mirrors when easing near curbs, keep extra distance in drive-thrus and tight garages, and do not let anyone else park your car. Washing technique matters too — rinse grit away before any contact wash, and skip brush tunnels that drag debris across the finish. For a deeper dive on protecting rims through impact zones, see our guide to Tesla wheel covers curb protection.
Frequently Asked Questions
Can you repair a scratched Tesla wheel cover yourself?
Yes — light to moderate scratches are very DIY-friendly because ABS takes polish and touch-up paint well. Deep gouges and cracked clips are the exception; those compromise fit and appearance in ways a home repair cannot hide.
Is it cheaper to repair or replace a scratched wheel cover?
For a single light scratch, a Tesla wheel cover scratch repair costs a fraction of any replacement. For multiple deep gouges, replacing the set usually wins on both looks and time, especially with affordable aftermarket options that arrive pre-finished and ready to clip on.
Will a scratched cover damage the wheel underneath?
Almost never. Scratches are cosmetic, and the cover actually shields the alloy behind it. The only warning sign is a lifted or cracked edge that lets water and dirt sit against the wheel — repair or replace that cover promptly.
Scratched covers are the cost of daily driving — the cover took the hit so your alloy did not. Fix the light ones in an afternoon, swap out the hopeless ones, and your Model 3 or Model Y keeps that factory-fresh stance. Browse the full range of Tesla wheel covers at Nauticrim and turn tomorrow’s parking scuff into a five-minute fix.